
Reviewed · SECOND WORLD WAR HISTORY
Battle Of Arnhem Route Self Guided 5km – 2,5 hours
Arnhem gets interesting fast when you walk it like a storyline. This self guided Battle of Arnhem route uses location-based photos to tell you what happened at each spot, turning ordinary streets into a clear timeline of the Battle of Arnhem. I love that you get a walking route that feels made for real time, not a rushed checklist.
My other big win is the way the included Google map links help you keep your bearings without fuss. The only drawback is there is no live guide, so you will need to slow down enough to read and look at what the route shows you as you go.
Key highlights before you start
- A 5 km, about 2.5 hour walk through key Battle of Arnhem sites
- Mobile ticket and a PDF route with Google map links to help you stay on track
- Photo prompts that explain what you are standing near
- All major stops are free, including the Airborne at the Bridge museum visit
- Major landmarks tied to famous names and stories, including Major-General Urquhart and A Bridge Too Far
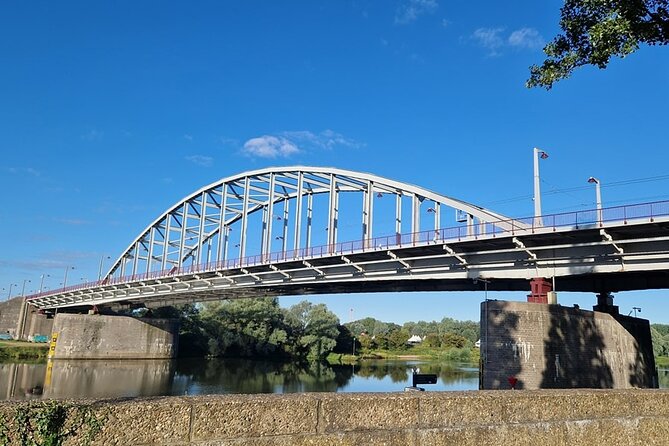
- John Frost Bridge history you can see and reflect on, right at the end of the route
Arnhem on Foot: A 5 km Battle of Arnhem Storyline
This is the kind of tour that makes you pay attention to what is usually background. You start near Arnhem Central Station and you finish at the John Frost Bridge, walking a total of about 5 km. The whole thing is designed to take around 2 hours 30 minutes, with built-in time at each stop so you do not feel like you are sprinting between moments.
What makes it especially appealing is the way it connects places you can actually reach to what mattered during the Battle of Arnhem and Operation Market Garden. You are not just reading names on a plaque. You are walking to the spots, then seeing photos and explanations that put the war into context where it happened.
For me, the best part is the pacing. Each stop is short enough to keep your energy up, but long enough to absorb what you are seeing. If you like history that feels grounded in real streets and buildings, this route fits.
More self-guided routes in Arnhem:
- Arnhem Self Guided Sherlock Holmes Murder Mystery Game
★ 4.5 · 5 reviews - Amsterdam: 75 Minute City Canal Cruise with Audio Guide
★ 4.4 · 19,938 reviews - Amsterdam: Royal Palace Entry Ticket + Audio guide
★ 4.6 · 7,889 reviews
How the Self Guided Route Works (Mobile Ticket + Photo Prompts)
You will get a mobile ticket plus a PDF with the route details and Google map links. The route is also offered in English, and you should get your confirmation at booking time.
The heart of the experience is how the story is delivered. At each location, you are shown information through photos that have meaning for that exact spot. That approach does two useful things for you. First, it prevents that common self guided problem where you wonder if you are standing in the right place. Second, it helps you build a mental picture of what you are looking at now and what it meant then.
Practical rhythm tip: do not treat this like a casual sightseeing loop. Treat it like a guided walk, but with you in charge of the pace. Pause when a stop asks you to. Your time will feel well spent because the route is built around those pauses.
One more plus, and it comes up in the feedback people give after, is that the map link support is genuinely helpful for staying on track. If you like to walk confidently and avoid wrong turns, you will appreciate that.
Stop 1: Arnhem Central Station and the Start Near SPAR
Your first stop is right where the route makes it easy to begin: Arnhem Central Station, near the SPAR supermarket area. The route begins in front of the supermarket, and your story starts there too. From the very first location, the design goal is clear, you are meant to orient yourself, then start connecting the modern street to the events of the battle.
You will get about 15 minutes here, and you are looking at location-linked photos that guide your understanding of what happened around this part of Arnhem. If you are thinking, OK, but how do I tell this is important, that is exactly what the route is doing. It gives you a story anchor, right at a transit hub that feels familiar.
Small practical note: because you start near a major station, there is usually steady pedestrian movement. That can be a good thing. You will not feel isolated, and you can take your time at a comfortable pace. Just be ready to stop briefly and read, then move on when the street clears a bit.
Stop 2: St. Elisabeths Hospital, Utrechtsestraat Views, and Why It Was Spared
Next you move to Tandartsenpraktijk St. Elisabeths Gasthuis, tied to the former St. Elisabeth Hospital. This is one of Arnhem’s most iconic buildings, and it plays an important role in the Battle of Arnhem story.
You get about 20 minutes here. The route also points you along Utrechtsestraat, and it notes a lookout point with a view over the south of Arnhem. That matters because it helps you understand the battlefield from the right angle. Instead of only thinking about buildings, you get a sense of the broader area.
Here is the key story element you should focus on at this stop: a lot of fighting took place around the former hospital, but the hospital itself was spared because of its function. In other words, the route is not just telling you that something happened nearby. It is explaining why this specific building survived while other parts around it were affected.
Consideration: this stop can take longer if you stop to look at the view. That is not a problem, it is the point. Just keep an eye on your overall timing so you do not rush later stops.
A few other ways to fill a day in Arnhem
- Arnhem: Burgers’ Zoo Entry Ticket
★ 4.7 · 88 reviews - Oosterbeek: Airborne Museum Hartenstein Entry Ticket
★ 4.7 · 58 reviews - e-Scavenger hunt Arnhem: Explore the city at your own pace
★ 4.0 · 19 reviews - 2,5 hour Battle of Arnhem Tour with Private Guide
★ 5.0 · 16 reviews
Stop 3: Urquhart House at ’T Huukske and the A Bridge Too Far Connection
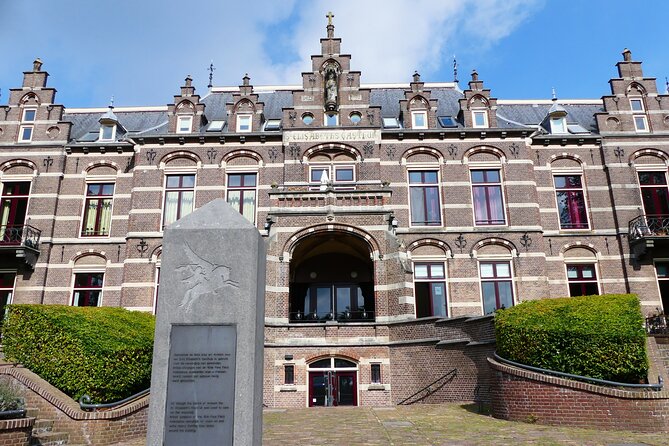
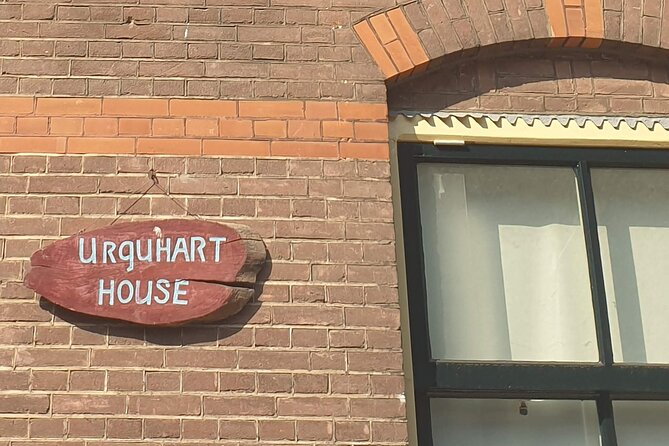
Just around the corner from St. Elisabeths Hospital is ’T Huukske, linked to the Urquhart House. This is the place where Major-General Urquhart took shelter. The route also connects it to a memorable moment from the film A Bridge Too Far, where the general is played by Sir Sean Connery.
You will have about 20 minutes at this stop. The route’s photo-led storytelling helps you connect the real location to the film reference without needing to know the movie beforehand. Still, if you have seen A Bridge Too Far, you will likely feel a quick click of recognition once you are standing here.
What I like about this stop is how it shows you the human side of war decisions. Shelter is not a big dramatic word, it is practical, it is urgent, and it is tied to a specific person. That makes the history feel more real, because you can imagine what it means to hide, wait, and hope for something better.
If you are traveling with teens or family, this is also one of the more memorable stops. A film connection plus a specific name tends to hold attention better than dates alone.
Stop 4: Sabelspoort of Eusebiuspoort uit 1357 and the Old Gate You Can Still See
Your next waypoint is Sabelspoort of Eusebiuspoort uit 1357. The route calls it the only old gate in the city left intact. That alone is a reason to slow down, because you are looking at something with medieval roots that survived, and then was affected during the Battle of Arnhem.
This part is only about 15 minutes on paper, but it is the kind of stop where you can easily steal extra minutes for photos. The route says the gate was heavily damaged during the Battle of Arnhem but rebuilt after World War II. In other words, you are looking at resilience, not just survival.
A practical detail: entrance to this gate is not possible along the route. That means you will explore from the outside and focus on what you can photograph and see. I recommend you do exactly that. Take your time with angles and street-level perspective, because you are working with what you can access.
Also, if you see people lingering for photos nearby, join them briefly. This gate area seems made for that, and it is a good place to take a breather before the museum stop.
Stop 5: Airborne at the Bridge, Level -1, and a Timeline in Video Form
Then comes the museum stop: Airborne at the bridge. This is a fee-free museum, and it is worth carving out time for if you want the battle timeline to click into place.
You get about 25 minutes here. The route tells you to go down to level -1 for a video impression of the timeline of the Battle of Arnhem. That matters because it gives you a structure for everything else you have been seeing above ground. After watching it, the street-level sites start to make more sense as sequence, cause, and consequence.
What I like about this stop is the balance it brings. Outside, you are looking at architecture and urban shape. Inside, you get a timeline that ties those visuals into a story you can follow.
Practical advice: treat this as a brief orientation, not a marathon. If you watch the video and take a moment to notice what it emphasizes, you will be better prepared for the final memorial stop. Also, if crowds form, you can still watch and absorb at your own pace since the rest of the route does not disappear after you finish the video.
Stop 6: The John Frost Bridge, Three Bombings, and Your Walk Back
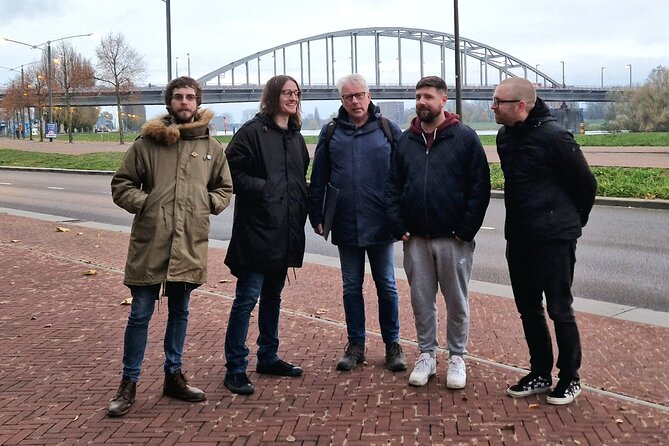
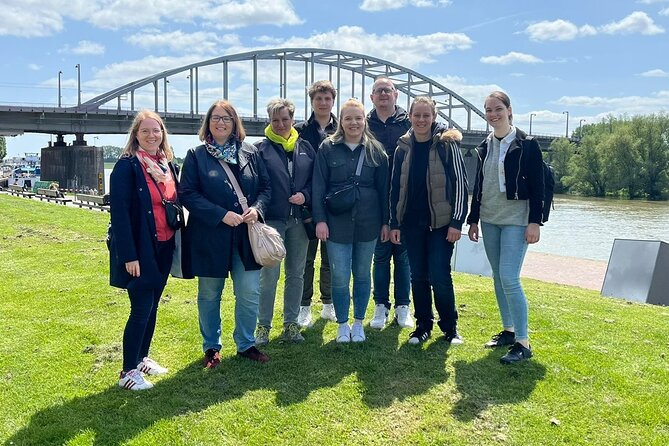
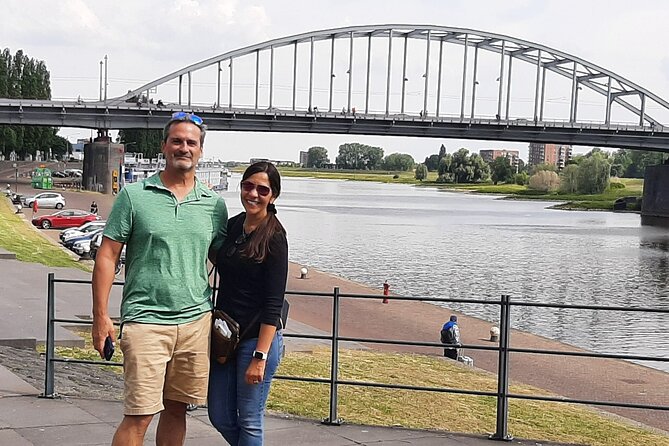
The final stop is the John Frost Bridge, or John Frostbrug. This is the end station of the Battle of Arnhem route, and it is the kind of place where you will want to pause even if you are normally a fast walker.
The route is thoughtful about the war facts. It notes that during the war, the crossing was bombed three times by the Dutch in 1940, the Allies in 1944, and the Germans in 1945. That detail is not there to shock you. It is there to show how contested the crossing was from multiple sides and across multiple years.
You are given about 25 minutes here. Take your time to explore the bridge and remember those who fought and fell. This is also where your route timing feels most natural. You are at the finish line, not halfway through, so you can slow down without worrying you will fall behind.
After the bridge, you have an easy walk back. The route says it is just a 5 to 10 minute walk back to the city center, and about a 20 minute walk back to Arnhem Central Railway Station. That is a big quality-of-life detail for a self guided tour, because you can end with food or shopping without backtracking.
Price, Timing, and Practical Value for Small Groups
The price is $14.89 per group, up to 4 people. That is a key value point. You are not paying per person for a small-group experience, you are paying for the route access for your group. If you are traveling with a friend or two, the math gets even better.
Duration is about 2 hours 30 minutes for roughly a 5 km route. On a day with other plans, that is realistic. You are not committing to a full half-day plus, and you still get a museum component plus multiple story stops.
English availability is also a value factor. A lot of battlefield routes are dense and multilingual, so having it in English reduces friction.
One more timing note: the experience is often booked about 11 days in advance on average. That suggests it is popular, so if your trip is fixed, it is smart to book earlier rather than later.
What to Expect in Real Life (and How to Keep It Fun)
Because this is self guided, the experience lives or dies by your pace and attention. Your job is not hard, but it is active. You will want to keep an eye on the route’s stop timings, about 15 to 25 minutes each, so you stay on track.
Here is a simple way to make it smoother:
- Start on time at Willemsplein 22, 6811 KB Arnhem, near Arnhem Central and the SPAR area.
- Use the PDF and Google map links when you arrive at each segment, especially around stop transitions.
- At each stop, read the photo-based prompts first, then look around the street or building itself. You’ll see more that way.
In terms of logistics, the tour says service animals are allowed and it is near public transportation. It also notes that most travelers can participate, which fits a standard urban walking route. Still, if you have mobility limits, your safest move is to take it slower and give yourself extra time, since the route includes outdoor segments and walking between stops.
Group size stays small because it is private, only your group participates. That matters if you want quieter conversation as you read and watch.
Who Should Book This Walk, and Who Might Want Something Else
This is a great fit if you like history that you can walk through, not just read about. It is also a strong choice for mixed-age groups because the format is visual and location-based. The film tie-in at ’T Huukske can help younger visitors or anyone who likes pop culture connections to stay engaged.
It also works well if you want flexibility. You can spend a little extra time at the gate photos or linger at the lookout idea near the hospital area, without feeling like you are holding up a live guide.
Where this might not be the best match is if you want someone to explain everything verbally on the spot. There is no live guide here, so you are doing the interpreting with the materials provided. That is fine for many people, and frankly it can be satisfying, but it is not ideal if you need constant narration.
Should You Book This Self Guided Battle of Arnhem Route?
I think you should book it if you want a structured, well-paced way to connect Arnhem’s streets to Operation Market Garden and the Battle of Arnhem. The combination of photo-led prompts, free major stops, and helpful map links makes it feel easier than most self guided history walks.
I would skip it only if you hate reading on your phone or prefer a live storyteller. Otherwise, this route is an efficient, thoughtful way to get real value out of a short time in Arnhem, and you end at the John Frost Bridge with enough context in your head to make the place hit harder.
FAQ
How long does the Battle of Arnhem route take?
The self guided route is listed as about 2 hours 30 minutes.
How far do I walk?
It is a 5 km route.
What language is the tour available in?
The tour is offered in English.
Is there an admission ticket cost for the stops?
The tour information lists admission ticket free at the stops, including the Airborne at the Bridge museum.
Where do I start and where does it end?
The start is Willemsplein 22, 6811 KB Arnhem, Netherlands, and the end is Foundation Housing Arnhem, Kadestraat 1, 6811 CA Arnhem, Netherlands. The route starts near the SPAR supermarket by Arnhem Central and ends near the John Frost Bridge.
Do I need a live guide?
No. This is a private self guided activity, and only your group participates.
Can I get help staying on the route?
Yes. You receive a PDF describing the route and includes Google map links, plus photos to support the story at each location.
What is the cancellation policy?
This experience is non-refundable and cannot be changed for any reason. If you cancel or ask for an amendment, the amount you paid will not be refunded.
Latest Arnhem reviews
- Exciting Murder Mystery – Interactive city walk in Arnhem★ 4.5 · 3 reviews
- Arnhem Self Guided Sherlock Holmes Murder Mystery Game★ 4.5 · 5 reviews
- 6 Hour Battle of Arnhem Tour by Car with Private Guide★ 5.0 · 6 reviews
- e-Scavenger hunt Arnhem: Explore the city at your own pace★ 4.0 · 19 reviews
- Oosterbeek: Airborne Museum Hartenstein Entry Ticket★ 4.7 · 58 reviews
- 2,5 hour Battle of Arnhem Tour with Private Guide★ 5.0 · 16 reviews
- Arnhem: Burgers’ Zoo Entry Ticket★ 4.7 · 88 reviews